Categories
Android Hacking Hardware Linux Science and Technology

How My Love Affair with Google Ended When I Decided to Stop Being their Unpaid Beta Tester

(This blog post was originally started back in 2016 when I decided to give up on Android for good. I never got around to posting it, even though it’s basically finished, and I still agree with it today! You can pretty much just replace any mention of “Nexus phones” in your head with “Pixel phones” and the argument still works.

With Google seemingly losing interest with Pixel phones in mid-2020, the post is just as relevant today as it was nearly five years ago.)

Logo for Android Version 4.4

The Passion of the Android

Spend a little while on any site that focuses on anything Android, whether it’s phones or apps, and you’ll quickly realize that the Nexus phones produced by Google are held in esteem above all others.

Their specs are lauded.  Their problems glossed over.  Their ability to “always have the latest OS version” (an ability iPhone owners take for granted) unlike phones you get directly from cell phone companies (think AT&T and Verizon), is held in the highest regard, especially.

To the visitors and commenters on these sites, the ability of a Nexus phone bought from Google, to have the newest version of Android before all other phones in the massive Android universe is more important than anything else, be it a sacrifice of 1) speed (because of the higher memory usage of newer software versions), 2) reliability (because of the presence of hidden bugs inherent in all new software), or 3) compatibility (because of app makers not always being able to get new versions of apps release in time to support new versions of Android, if something has broken the app).

All sorts of reasons are brought up for why this is best.  “The phone companies don’t want to upgrade the Android versions on their phones in a timely fashion because they’re lazy and don’t care.“  “The phone makers (also called OEM’s) don’t want to upgrade the Android versions on their phones in a timely fashion because they want you to buy a new phone.

Since version 2.3 of Android, the version of Android running on your phone has been far less important because of Google Play Services

While there are very important reasons that upgraded software on your phone is important (like security fixes, patches, etc), the insane concern for the version number on your phone always being the latest defies all understanding.  Since back in the Android 2.3 days, the Android team at Google even moved most of the important parts of Android (the fun parts that get updated) into a standalone app called “Google Play Services” a few years ago to combat the problem of OEM’s and cell phone companies not updating the Android versions of their phones.

If you have an Android phone, you can go into the full list of apps installed in your settings and see “Google Play Services” there — you can’t stop it from updating, and no one, including the cell phone companies and OEM’s, can stop it either.  This way, even older phones running older versions of Android can still have compatibility and quite a bit of neat new features that newer versions of Android get (like the Android Device Manager, Android’s answer to the iPhone’s “Find My Phone” feature).  The changes to this hidden service layer are subtle, well tested, and ensured to not cause any problems in the massive universe of different Android phone types.

Getting a fully new version of Android is less important in this way, but still offers some benefits here and there (like encryption being a default setting in Android 6.0).  Still, cell phone companies and OEM’s only release full new versions of Android for their phones after months, sometimes a year or more, of testing.  Why is this important?

Yo, do you even test, dude

When you’re a company like HTC (my favorite Android phone maker), or a cell phone company like Sprint, you live and die by your core product. If you work at HTC and your phones suck when it comes to reliability or user experience (or UX), you’re toast.  If you work at Sprint and your service is slow and the phones people buy from your stores don’t work (even though you don’t make them), people stop buying your phones and recommending your service to their friends.

The iPhone/iOS team at Apple does this behind the scenes for months with their products, both phones and operating systems.  Car companies do it for their car software.  Your microwave uses software that was tested for years to make sure the buttons always worked when you pressed them, and to ensure that it didn’t set your food on fire.

Why I bring this up is because I’m reasonably certain, after years of using Nexus phones, that the Nexus team at Google either doesn’t do this type of UX testing, or does it very, very little.

And why would they?

Google doesn’t make money selling phones.  It’s a B2B (business-to-business) company that makes 90% of its profits selling ad space to commercial entities (I went through the work of looking through its investor documents, found here (page 32): https://abc.xyz/investor/pdf/20160331_alphabet_10Q.pdf)  Everything else Google does is minor, and whatever minuscule amount of profit it makes from selling Nexus phones is an even smaller part of that.

Google doesn’t make money selling phones.  It’s a B2B (business-to-business) company that makes 90% of its profits selling ad space to commercial entities

…and there’s nothing wrong with that.  The employees of Google are very good at what they do.  They should focus on their core business, and put the bulk of their resources into effectively selling ads.
		
Categories
Android Enterprise Computing Hardware Science and Technology

Unified Internal Storage for Android 6.0+

Thinking about using Unified Internal Storage on Android 6.0+ to expand your phone’s measly internal storage?  Don’t even think about using it with anything other than a UHS-II SD card — even if your phone will let you use a slower card, don’t do it — your performance will be terrible.

It seems like it has to be UHS-II, for some reason (maybe it’s random r/w speeds?). I tried with even a very, very fast UHS-I, that benchmarked nearly the same, but Android wasn’t satisfied with it, giving the “This SD card is slow” warning.

The best priced one I could find out there (that you’d want to use) was a 32GB one:

https://www.bhphotovideo.com/c/product/1211505-REG

Categories
Android Hacking Hardware

Creating a QI Wireless-charging Case for the Moto X (or any phone, really)

The Moto X (2013) is one of the best Android phones there is — it’s thin, it’s light, and the battery lasts nearly two days.  It’s got passive, voice-activated features that you can use even when the phone is locked and in your pocket.  You can launch your camera just by flicking your wrist in a certain way.  It’s got a lot of great features… but (eventhough there’s actually space inside the phone for it) QI-compatible wireless-charging was left off that list.

There are mods out there to take apart the Moto X and install a QI charging bad, but it renders you unable to charge your phone via a conventional cable when necessary, so I didn’t want to take that route.  Even if I have access to wireless charging pads at home, there’s going to be a situation where I’m going to need to charge my phone away from home, and modifying your phone in that way would prevent that (without disassembly).

When looking for wireless-charging compatible cases for my MotoX, the pickings were slim — I found one that was compatible with Duracell’s (proprietary, and not very well supported) Powermat technology, however, I’m wanting to take advantage of the huge mount of QI-compatible wireless-charging devices already out there.  QI is a technology that’s already been used by Nokia and Google for years now, and it’s licensed much more easily than Duracell’s technology.

So, I set about making my own QI-compatible wireless-charging case, using parts you can buy easily on Amazon.

#1) Buy your parts

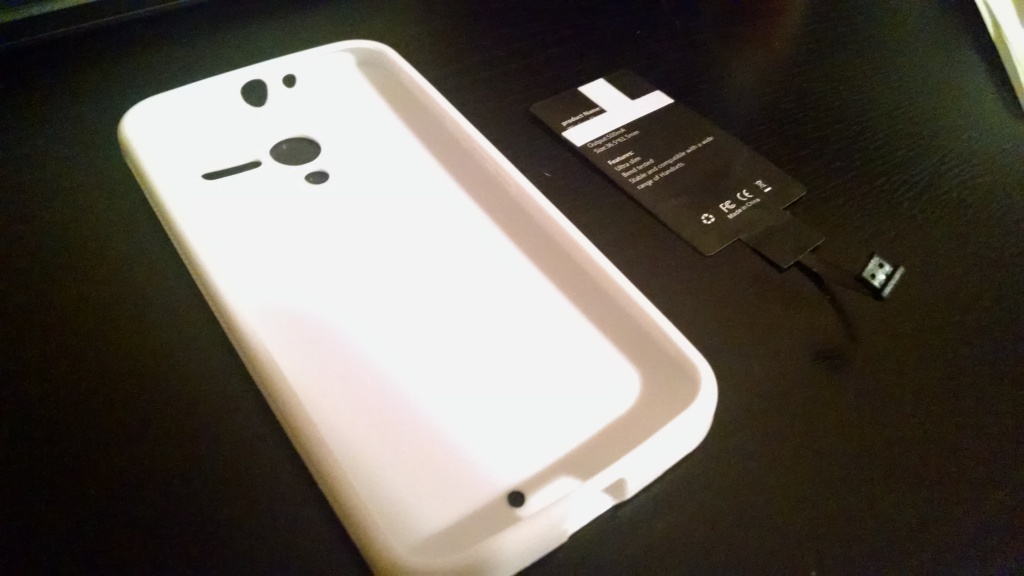
Moto X and QI wireless charging pad, side by sideImportant: Get a QI-compatible charging receiver with the USB plug that faces up.  The case doesn’t matter, as long as it’s one that leaves enough room between the phone and the case so that there’s room for the charging pad.

#2) Test fit your charging pad in the case

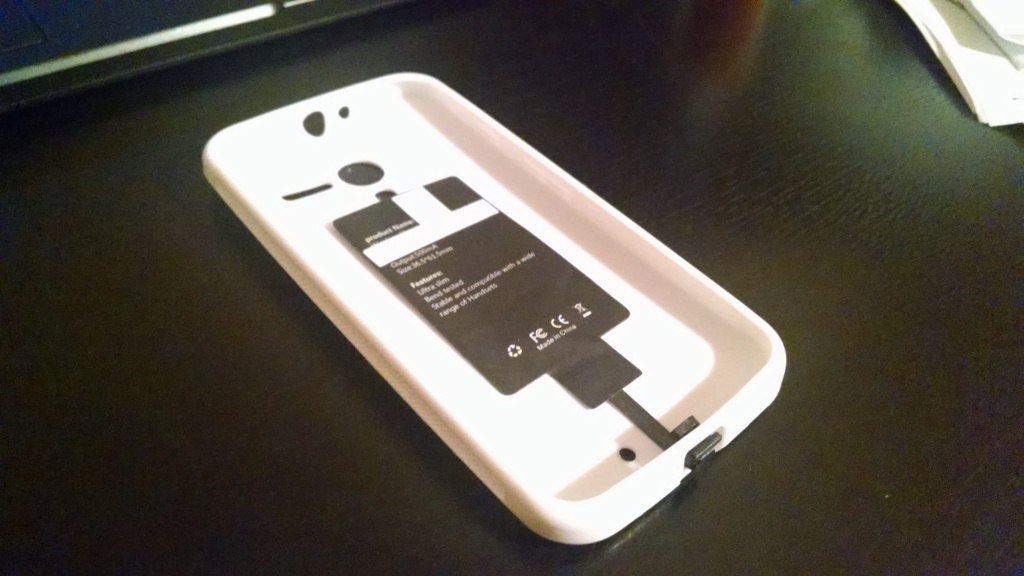
Charing pad just sitting in case.

Try placing the charging pad in the case, and plugging the connector into your phone (at the bottom).  The case will “pinch” the connector cable a little — this is okay.  It’s durable, and very thin.

When you’ve figured out where the pad will sit when sandwiched between your phone and the case when it’s plugged in, move to step #3.

#3) Glue your case (or attach with tape)

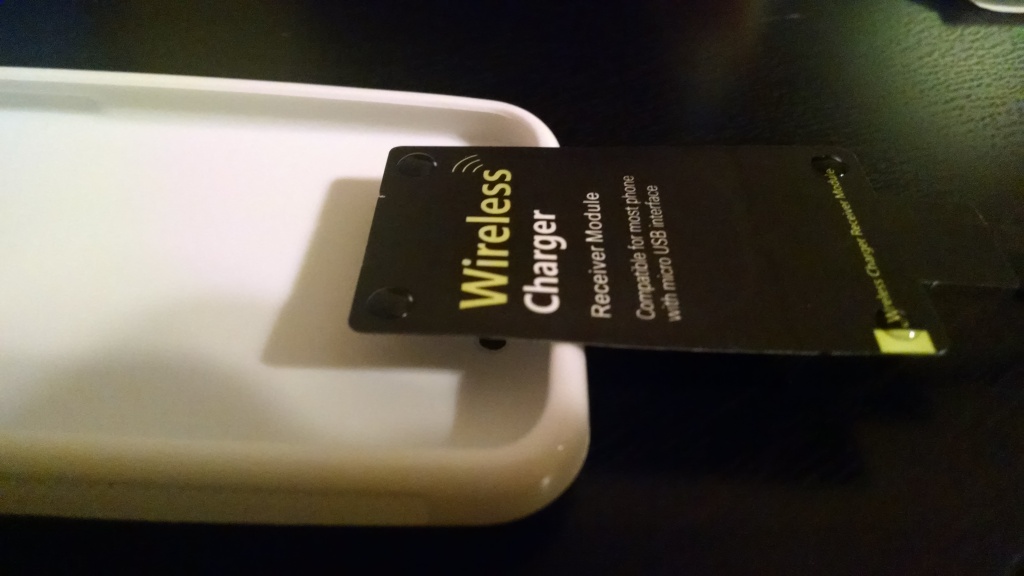
Glue on four corners of charging pad

When you’re ready, put four drops of glue and place the pad into its final resting position that you decided upon in Step #2 (or just place it there and put four pieces of clear tape over the corners — this is what I had to do eventually when the glue wouldn’t hold).

#4) Seat everything together

Phone with case on with charging pad installed.

When your glue has dried (or your tape has been placed), carefully insert the QI charging pad cable into your phone’s USB port, and place your phone into the case.  Everything should sit together nicely, which just the little extrusion for the USB plug.

#5) Charge on a QI-compatible charger

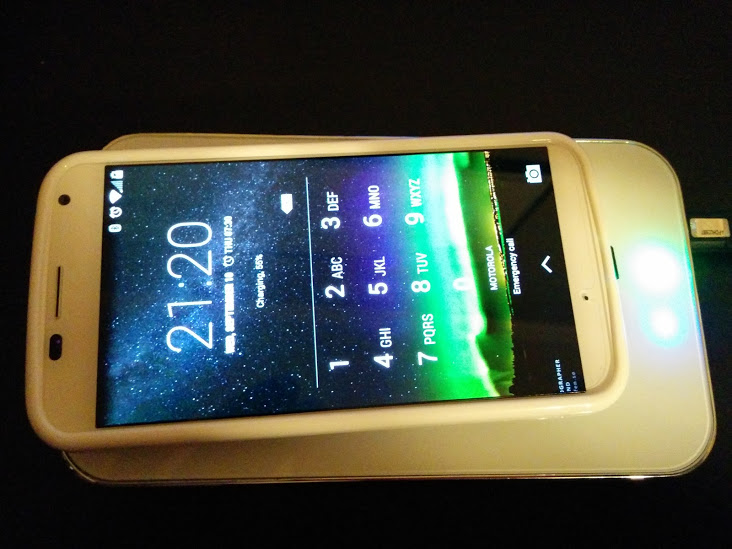
Moto X with QI charging case on wireless charging pad.

When I placed my phone on the Anker charging pad, it started charging right away!  The phone even reflected so on the battery icon — I had heard from similar tutorials that sometimes this was not the case.  The phone would be charging, but the icon on the home screen would not show it.

I think this is due to whatever combination of charging pad and QI insert these individuals were using was not sufficient enough for the phone to reflect it, even though an actual current was being delivered to the phone.  I have experienced this in the past with Android tablets, if you’re using a charger that didn’t come with the tablet — the tablet would charge, even if the tablet’s UI didn’t reflect it.  It would charge very, very slowly.

So, good luck, and happy charging!

Categories
Android Programming

Unlocking/Rooting the HTC One on Linux

I recently bought a used HTC One that I intend on using on Ting — it’s a phone I’ve been wanting to use for about a year. It’s one of the nicest Android phones, with hardware quality approaching that of an iPhone. (Not to mention a software skin much more “professional” looking than a lot of other Android hardware manufacturers out there.)

HTC One Dimensions Picture
Isn’t it beautiful?

I didn’t want to flash or even necessarily root my HTC One, however, the only way to restore some apps (like the Google Authenticator) require rooting, so I had to do it.  What’s strange is that most tutorials and utilities I’ve found are for Windows (like this one from theunlockr) — I guess it shouldn’t be too surprising, considering most PC’s are Windows, but I’d figure that there would at least be some tutorials for Linux, considering Android’s origins.

Well, the good thing is that unlocking/rooting your HTC One on Linux isn’t really that hard at all, if you’re comfortable with the command-line, and familiar with using the android sdk tools (fastboot, etc.).

I’m not going to go into how to set up the Android sdk, etc, since if you’re doing something like manually unlocking your bootloader, you should already be familiar with it!

Unlocking/Rooting Your HTC One (M7) on Linux

Prerequisites:

  • android sdk
  • htcdev.com account
  • Latest recovery .img file from CWM
  • Superuser Hack .zip file: SuperSU (make sure and get whatever is the latest version of the SuperSU flashable zip — earlier versions found in other tutorials no longer work to root the later versions of Sense)

Unlock Bootloader

  • Boot into bootloader and select Fastboot
  • Run command “fastboot oem get_identifier_token”
  • Copy token as explained on the htcdev page, and await your Unlock_code.bin file in email
  • Copy Unlock_code.bin file to your working directory in Linux
  • Run command “fastboot flash unlocktoken Unlock_code.bin”
  • Follow prompts on screen to unlock/reset your phone

Flash Recovery

  • Boot into bootloader and select Fastboot
  • Run command “fastboot flash recovery <recovery.img>” (replace with .img file downloaded from CWM site)
  • Reboot

Root

  • Copy SuperSU .zip file to phone’s internal memory
  • Reboot into recovery
  • Flash SuperSU .zip file
  • Reboot and enjoy
Other Useful Links
Categories
Android

Android 4.3 Radios for Sprint Galaxy Nexus

Can’t update your Sprint Galaxy Nexus to Android 4.3, but want to enjoy the new radios (which actually do improve signal strength a good bit)?

Tried to download the 4.3 update but it just won’t install on your Galaxy Nexus?  (Maybe you’ve rooted, hacked away at something — I’m not judging.)

Well, I can confirm that this link below works great to flash just the radios.

xda-developers – View Single Post – [ROM][AOSP][4.3.1][JLS36I] OFFICIAL CyanogenMod 10.2 Nightlies.

Categories
Android Linux

Startup Script for CM9 on the Droid Incredible 2

There’s a small bug when running Cyanogenmod 9 (Android 4.0.4) on the Droid Incredible 2 — every time you reboot, you have to run the command “killall drmserver” as root, or you won’t be able to install or upgrade any applications.

Now, why this isn’t baked into the OS, I don’t know, but in lieu of having to start a terminal every time you start up your phone and run this command, you can actually create a startup script.

It’s never that easy on linux (seems to be different on every distro), but the way it seems to be done on CM9 is:

1) First, create the directory ‘/data/local/userinit.d’ with the following command:

mkdir -p /data/local/userinit.d

2) Then, create your script in this directory and make sure and make it executable (chmod 755, at least) — I had something like:

#!/system/bin/sh

killall drmserver