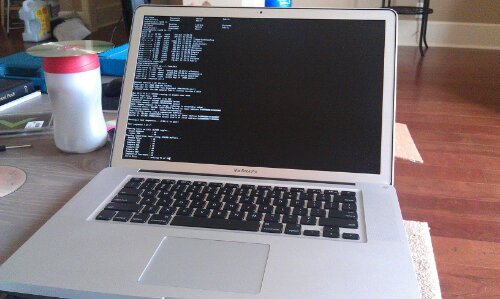
[Editor’s Note: Dreamhost no longer allows sudo access on their VPS servers, so the below is no longer possible. If you’re reading this, you might want to check out Amazon’s AWS. Nowhere near as user friendly as Dreamhost, but MUCH more powerful.]
I’ve been a happy customer of DreamHost for many years now — for $9.95 a month, I was able to get loads of diskspace and unlimited bandwidth, all from a great company that was staffed by great people who were very technically competent.
It is “shared hosting,” however — that means you’re getting it that cheap because you’re sharing server CPU power, available RAM, etc, with many other people who are also getting a great deal. You’ll notice this in any WordPress sites you may run on Dreamhost’s shared hosting — there’s about a 7-10 second delay between when you navigate to your site and when your page actually loads, mostly because your server processes are waiting in line behind everyone else’s.
So, Dreamhost does offer a “VPS” service — with this, you’re getting an absolute amount of RAM, CPU power, etc, that will only be used for your sites. It’s a tiny bit more expensive, at $14.95 or so a month, but it’s worth every penny.
If you’ve run WordPress installations on a Dreamhost site, though, you know that your mysql databases are on a seperate server entirely, and that may slow things down as well. Even if you move your WordPress installs to a VPS, your mysql databases will still be on shared hosting. DreamHost offers a “MySQL VPS,” but it costs another $15 a month (minimum), and you have no control over it at all.
A better solution would be to run your own MySQL server on DreamHost’s main VPS, since they give you root command-line access. There are a few hiccups in this process (some put there by DreamHost itself), but otherwise you should be able to do it.
- First, create an admin user for your VPS that has sudo abilities, and log into your VPS with that through ssh.
- Second, you have to tweak apt so you can even install the mysql-server package. It appears as if part of installing packages through apt involves temporarily storing files in /tmp and then running them from there.Unfortunately, the /tmp directory is mounted on DreamHost’s VPS servers with the noexec option, which means that you can’t run files that are present in that directory. That basically prevents you from installing the mysql-server package until you tweak apt to temporarily stage files in /var/tmp instead. Do this by:Creating a file called apt.conf in the /etc/apt/ directory, and edit it so the contents are the following:
APT::ExtractTemplates::TempDir "/var/tmp";
- Then, install the mysql-server package:
sudo apt-get install mysql-server;
(When it asks to set a root password, make sure and set one.)
- Now, edit the file /etc/mysql/my.cnf and set the following options:
bind-address=psXXXXX.dreamhostps.com
(Replace psXXXXX with the name of your dreamhost VPS.)
- Restart your mysql service:
sudo service mysql restart
At this point, you should be able to log in to your new mysql server:
mysql -u root -p
and then perform what SQL functions you need to.
A great thing to do is to install phpmyadmin using the tutorial here: http://wiki.phpmyadmin.net/pma/Quick_Install
First you’ll want to create a user (that isn’t your root user) to log into phpmyadmin:
mysql> CREATE USER ‘newusr’@’%’ IDENTIFIED BY ‘your_password';
mysql> GRANT ALL PRIVILEGES ON *.* TO ‘newusr’@’%’ WITH GRANT OPTION;
At this point, you can sync your old databases to your new mysql server using the built-in sync tool that’s in DreamHost’s installations of phpmyadmin. Then, just edit the wp-config.php file in the folder of your WordPress installations, and change the line that says the following to your DreamHost VPS:
define('DB_HOST', 'psXXXXXX.dreamhostps.com');
Sources:
http://howtogetitworking.com/2011/06/28/installing-mysqld-dreamhost-vps/
https://bugs.launchpad.net/ubuntu/+source/debconf/+bug/90085
http://serverfault.com/questions/72356/how-useful-is-mounting-tmp-noexec


 After six months or so of being wowed by a little portable scanner in a doctor’s office, the spouse and I finally decided to buy one. I wanted one that’s compatible with Ubuntu, since that’s our main OS around home, so I did a little research, and found some info about the Plustek Opticslim m12 (it’s the same model that the “NeatReceipts” company rebrands for their own scanners).